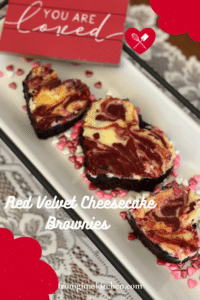
Move over chocolate covered strawberries! This dessert will steal your heart!
By Gina Michak

Move over chocolate covered strawberries! This dessert will steal your heart!
By Gina Michak

By Gina Michak
Hello, hello, foodie friends need ideas for easy summertime snacks?!
It’s been a second (or two) since I last posted. But it’s been a busy season for me in the Kitchen, on the Disney travel side, and with my BFF in wine, Ann Marie!
We just finished our 11th episode of “The Curly Girls” and couldn’t be prouder of the episode. It was totally unscripted, we were having fun talking and eating and laughing the whole time! Make sure to hop over to Facebook to watch!
I wanted to post the quick and easy ideas we shared last month. Nothing too complicated, just fun and tasty snacks presented in new ways! The following recipes are the perfect easy summertime snacks!
I showed you how easy it is to try the latest “Pinterest” craze of “jar cuteries” , and took that to a sweet level by making up my own “Cookie Jar Cuterie”. I think that is the perfect party favor for your next themed bash. Graduation, wedding, bridal or baby shower, wine tasting, or easy summertime snacks.
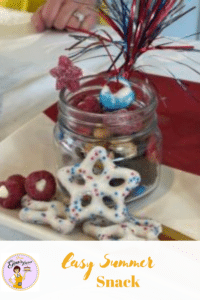
Mason jar of your choice- I picked a half pint for mine.
assorted candies (M&Ms, Skittles, Sno-Caps, gummies, anything you like )
Brownie or thick cookies for the base (can be homemade or store-bought)
Mini- chips (chocolate, white chocolate, butterscotch for example)
Fresh berries ( your favs, or mine: White chocolate chip stuffed raspberries)
Nuts
Pretzels (I used yogurt dipped ones )
Honey Sticks
Place your brownie at the bottom of the jar . You can also use cookies if you prefer. Layer the other ingredients (except for fresh fruit ) .
Top with the fruit, stuffed fruit OR “Boozy Maraschino Cherries”. like we did!
Well, thanks to Ann Marie’s surprise addition to the table, my cookie jar cuterie got an upgrade topping with her alcohol-infused cherries.
Easy.
Maraschino cherries
Vanilla Absolut Vodka
White Chocolate chips (melted)
blue sugar crystals
Soak the cherries overnight in the vodka. Drain, pat dry, and rid cherries of any excess moisture. Dip in melted white chocolate chips, then finish with a dip in the blue sugar crystals!
Enjoy them by themselves, or on top of your ice cream, brownies, or “Cookie Jar Coterie”!
” Jar Cuteries”
These little appetizer jars are like a great meat and cheese board, stuffed into personal-sized jars. You can fill yours with any of your typical board favorites: nuts, meats (swirled on toothpicks), cheeses (cut in fun shapes with cookie cutters or in cubes), stuffed pickled peppers, pepperoncini, mini breadsticks, honey sticks, and stuffed olives. Use your taste buds as a guide.
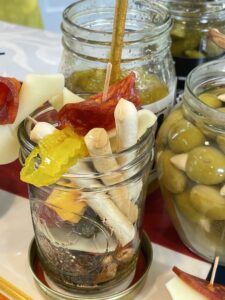
With a candied banana pepper as a garnish, this jar is ready to party!
Local peeps- our friends at Manassas Olive Oil Company carry many of the items I used for my jar.
Ann Marie introduced us to a wonderful WineShop at Home cabernet sauvignon by Glory Cellars. A favorite of my hubby’s, this wine has quite the back story. Reach out to her for details on how to order!
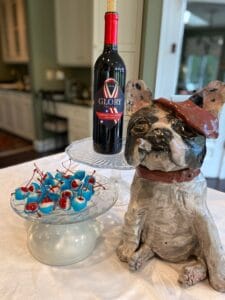
Why yes, Pierre, we suggest the Glory Cellars Cab Sauv. Glory Cellars wines support America’s Mighty Warriors, Wine Shop’s patriotic give-back program.
You’ll have to watch the WHOLE episode until the end to see Ann Marie’s surprise creation. It was decadently delicious.
Until next time,
Make life SWEET!
Gina
By Gina Michak
What dictionary definition do you think best describes my latest cupcake creation? “Old-Fashioned” – adjective: in or according to styles or types no longer current or common; not modern. noun: a cocktail consisting chiefly of whiskey, bitters, water, and sugar. That’s right, these cupcakes are inspired by the classic favorite “Old-Fashioned Cocktail”

As usual, I tweaked this up to utilize ingredients I had on hand, as well as used gluten-free flour. My intention was to give them to a friend who is GF, and I’m happy to say my substitutions worked. However, if you aren’t on a GF diet, use all-purpose flour as usual. The original recipe isn’t gluten-free.
Old-fashioned inspired cupcake recipe calls for sour cream, but I have been known to sub in greek yogurt. It’s a good fill-in, and I’m all about not running to the store in the middle of mixing! I also substituted half and half and agave syrup in the caramel glaze. After researching substitutions for heavy cream and corn syrup, I felt confident that the ingredients I had on hand would work. Of course, next time I bake, I will plan my shopping list more carefully and add heavy cream and corn syrup to it. My taste testers were all in agreement though, and said cheers to the “Old-fashioned Cupcake”!
Check your liquor cabinet or bar for bourbon. Remember, all bourbons are whiskeys, not all whiskeys are bourbons. Working with the ingredients I had one hand, I looked into using Crown Royal in the glaze. Sure enough, Crown Royal advertised an old-fashioned drink recipe on its website, so I went with that brand of whiskey. You only use two tablespoons in the glaze, no sense in running out to buy a bottle of something else at the last minute.
How to make the cupcakes: firstly, Line your muffin tin with paper liners. Melt the butter in a saucepan, allow it to cool. Whisk flour and dry ingredients (except sugars) in a medium bowl. secondly, In a separate bowl, combine sugars with melted butter, and add in sour cream, vanilla, and eggs. Lastly, Gently fold the flour mixture into the sugar mixture with a spatula/wooden spoon until combined. Divide batter up between the muffin cups, filling them 2/3 of the way. Bake for 20-25 minutes, or until tops bounce back when gently pressed.
Making the glaze: combine brown sugar, syrup butter, and salt in a saucepan on the stovetop over medium heat. Add water and stir, then bring to a simmer. Cook (swirling the pan occasionally ) for about 12-15 mins, until it reaches a deep brown color and thick enough to drip off of a spatula.
Meanwhile, combine the cream and cornstarch in a small bowl. Remove the glaze from heat, and slowly add to the caramel. Return pan to heat and stir frequently, cooking for an additional 5 minutes. Remove from heat and stir in the liquor (or vanilla). Let stand, stirring occasionally, for 30 minutes. The caramel is thick and slightly warm.
Glaze the cupcakes: Cut a slit in the top of each cupcake, and using a spoon, drip glaze into each slit, filling the cupcake up slightly. After “filling”, dip tops of cupcakes into the glaze and let excess drip off. Top each cupcake with an orange swirl and maraschino cherry!Cheers!
Let me know if you bake up a batch of these cocktail-inspired cupcakes. I’d love to hear from you!
Need more recipes to try, check out HOW TO MAKE STUFFED FRENCH TOAST
Gina
By Gina Michak
Looking for a new idea to add to your breakfast or brunch menu? Have I got a fun idea for you- Stuffed French Toast! I found this recipe on a food and wine pairing card sent to me from Wine Shop at Home. What I love about my wine shipments is that each wine comes with a recipe card that gives you specifics about the wine you purchased, ideas for food pairings, and a fun (and EASY) recipe to try!
I glanced quickly at the card and thought this was a casserole. My mistake…. it isn’t! If you are looking for a meal to serve a crowd (or the overnight french toast recipes that you see on Pinterest ) this isn’t it. It’s delicious, don’t get me wrong, but it’s designed more for a small gathering or perhaps breakfast for the family on a lazy Saturday or Sunday morning. I haven’t tried adapting it to a casserole format, but I think it could be done!
Once I read the recipe instructions, I got my supplies and ingredients together and got to work.

Griddle, electric skillet, or your favorite pan to cook the french toast “sandwiches” on.
Butter or Olive Oil spray (for the pan)
Mixing bowls
Whisk
Pancake flipper
Spatula
Wooden spoon
1 tub (8 oz) whipped cream
1 tablespoon brown sugar
3 teaspoons ground cinnamon
16 slices thick-sliced bread (Italian, French, sourdough, challah)
2 teaspoons vanilla
1/2 cup of your favorite fruit preserves (I used a combo of sour cherry and apricot)
5 eggs
1 cup milk
Mix cream cheese, brown sugar, 2 tsp. of cinnamon and 1 tsp of vanilla in a small bowl until blended. Spread two tablespoons of this mixture on each of eight slices of bread. Top the other eight slices of bread with the fruit preserves (about a tablespoon on each).
Press one of each bread slices together to form a sandwich.
Beat eggs with a whisk in a shallow mixing bowl or pan. Add milk and remaining cinnamon and vanilla and mix well. Dip sandwiches in egg mixture until coated on both sides.
Spray skillet with non-stick spray and heat. Once heated, place 2-4 coated sandwiches on a hot skillet/griddle for 4-5 mins each side or until golden brown. Repeat with remaining sandwiches, until done.
Serve warm with your favorite toppings. Homemade whipping cream, maple syrup, and fresh fruit are excellent choices! Add a drizzle of Manassas Olive Oil Company’s Blueberry or Cara-Cara orange balsamic over the fruit before serving, too. We loved the Cara-Cara with raspberries.
Watch here to see how we paired this dish with a cocktail created by Ann Marie Railing
I hope you enjoy this breakfast or brunch treat. Need a quick snack for one? Head over to this blog post The Best Individual Microwave Mug Brownies!
Cheers to good times around your kitchen table!
Gina
By Gina Michak
These are the best individual microwave mug brownies that hit the spot every time. This recipe is a delicious way to get your warm, fresh-baked brownie fix in a hurry.
You might remember the “boozy” version of this from last March, as part of my “year of brownies” series. That recipe yielded four mug brownies, perfect for a family dessert treat.
Today I decided to tweak that recipe for a scaled-down version that yields a single mug brownie, ready in 1 minute and 30 seconds (not including prep time.)

Remember to use a microwave-safe bowl or mug for mixing or heating.
Generously spray your microwave-safe mug or mixing bowl with cooking spray.
Add all the ingredients directly into the mug or mixing bowl and then mix them.
Microwave the brownie mixture in the mug for 1 minute and 30 seconds, test with a toothpick until it comes out clean.
allow to cool, and then top with whipped cream or powdered sugar.
The possibilities are endless with this microwave mug brownie. If you try out this recipe snap a picture and tag me. I can’t wait to see the different varieties that you come up with!
Liked this recipe? Check out these tasty No-Bake Energy Bites. They’re quick and easy. Perfect for an afternoon pick-me-up snack or a great addition to your morning breakfast.
By Gina Michak
New Year, new recipe, foodie friends! These quick and easy no-bake energy bars were a quick and easy way to get back into the kitchen, Lightning quick to put together, and a snap to shape. You could roll them into balls too, but I have the cutest little silicone bar pan from my friend Kerry O’neill over at Tastefully Simple so I choose to turn mine into “bars” this time.
I have to admit, for as much as I love baking up a storm in the kitchen, I also love a few days or even a week or so off from baking. Gasp! I said it! Even this baker gal needs a little time away from her mixer and oven!
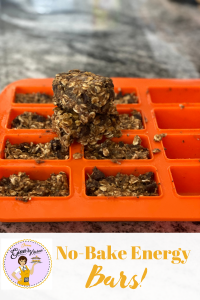
These quick and easy no-bake energy bars are SO good… I had a hard time only eating one at a time. Confession… I didn’t. I enjoyed two as a post-workout snack and it was delightful! Dare I say.. a sweet way to end a spin class????
Feel free to substitute other nut butter for the peanut butter, and you can also omit the chia, hemp, or flaxseeds. I added both flaxseeds and flaxseed meals, but you don’t have to use the seeds.
Combine all ingredients together in a mixing bowl.
Roll or form into 1 inch balls using hands or scoop.
Pop them into the freezer till they set. about 1 hour.
Store in a freezer-safe bag or container and freeze. Let them come to room temperature before eating.
If you try this recipe share it on social media and tag me in!
Have you tried the Peppermint Hot Cocoa Brownies yet? It’s like taking a bite of peppermint hot cocoa instead of drinking.
Enjoy!
By Gina Michak
Why peppermint hot cocoa brownies?
Honestly, foodie friends, this is my favorite seasonal flavor combo- even more so than pumpkin spice!
There’s nothing better than a creamy cup of hot cocoa on a cold night! This brownie is just that… but in dessert form! My favorite holiday tradition is watching Christmas movies with my family why enjoying hot cocoa out of our Disney resort mugs. It’s like bringing a little of the magic home with us. Now we have a new dessert to pair the cocoa with.
I have made other desserts with this flavor combo, but this is the first time I’ve used it for a brownie. I’m loving the hint of cool peppermint, the crunchy crushed candy canes, and the deep, rich chocolatey goodness in every bite.
Sadly, it’s the final inspiration from Food Network Magazine’s “A Year of Brownies”. It’s my favorite, up there with the “Irish Whiskey mug brownie ” and the “Cookie Jar Brownie”. If you tried any of these recipes, let me know!
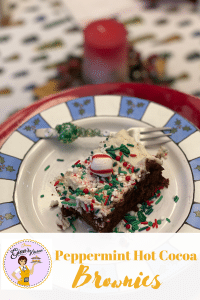
Although this peppermint hot cocoa brownie recipe is called a brownie, it reminds me more of cake. It’s topped with peppermint buttercream, sprinkled with crunchy crushed candy cane topping, and bakes up nice and tall in the 9×13 baking dish. After cutting a slice, you’ll see. It’s so decadent and so pretty! Serve yourself a big piece and enjoy on a fancy plate with a fork and cup of coffee!
My inspiration for this recipe was, of course, the magazine piece from earlier this year. It’s been tweaked a bit, and I added my own personal favorite buttercream recipe. What’s a cake without sprinkles? Toss some fun holiday sprinkles in with the crushed candy cane topping!
Now get into YOUR kitchen and bake up a batch or two over the holidays!
Check out last week’s post, Spiced Nut Mix!
Happy Holidays!
By Gina Michak
Happy (almost) Thanksgiving!
This blog post is brought to you by the food and wine duo ( of which I am the foodie half) “The Curly Girls”! Catch the latest episode!
Watch as I demonstrate how easy it is to make two appetizers (well, one can be a hostess gift as well!).
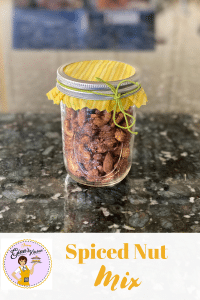
My inspiration for this recipe came from my most recent “Wine Shop at Home” club delivery. I LOVE cookbooks, cooking magazines, and recipe cards. I collect all of the above, and I ADORE the recipe cards I get each month from my club membership.
A few months back I tried this recipe (paired with the sparkling wine I received in my shipment) and my family raved about it. I tweaked a few things and decided I could incorporate a few other small business products into the “mix” lol. I also realized it’s easily doubled and can be placed in mason jars for gift gifting!
Most of you know that over in the Kitchen, it’s sweets and treats. I love my time on “The Curly Girls” because it gives me the chance to play around with all the other fun food things like appetizers, snacks, and main courses.
Now let’s get to the fun part- making this recipe!
Have you checked out our Pumpkin Pie Brownies?
Enjoy!
Gina
By Gina Michak
Happy Thanksgiving Week, Foodie Friends!
Thanksgiving day is traditionally the 4th Thursday in November, but it’s 2020 and we need all the happiness and holiday we can get! Agree? So I’ll celebrate for the entire week!
I seriously fell behind on my recipe testing this month. Being a custom baker at this time of the year is always fun, yet challenging. I’m often busy with many special orders and events, and with the exception of the events (again, 2020) I was blessed with many extra special custom orders.
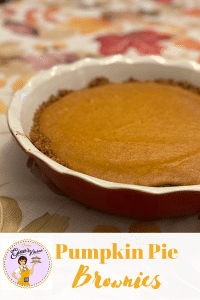
No worries, I did find the time this past weekend to make this month’s brownie! This seasonal flavored brownie a delicious addition to your Thanksgiving dessert menu, or the perfect treat for the holiday weekend. Who doesn’t need a little slice of pie for breakfast on Thanksgiving morn? Or a snack after black friday shopping (or, it’s 2020 so ) WHILE online black friday shopping , lol!
With three layers, it took sometime to prep, assemble and bake. But the ingredients are simple, each layer is easily combined in a bowl or microwave, and there’s no heavy mixing or equipment needed. I used one big bowl and washed it thoroughly in between making each layer. I also utilized the microwave instead of a double boiler to make the brownie layer.
You do need to cool this “pie” for at least 2 hours before serving. It’s well worth the wait.
Please go to the original recipe that I followed to take on this seasonal brownie dessert.

A little slice of pumpkin pie brownie is a sweet seasonal spin on two dessert favs!
I cannot WAIT to share December’s recipe with you, as it will also be a seasonal flavor that will make your taste buds tingle.
Happy Thanksgiving!
Gina
Wife, mom of three (four with the fur baby golden retriever), foodie, Disney addict, Pittsburgh native still bleeding black and gold although I'm living in VA! I went from assistant meeting planner to stay at home mom and combined my love of food, family, and parties into one little business "From Gina's Kitchen" . Not only do I bake custom desserts, I love to help plan parties and offer classes on cooking and baking for kids! Read More…
